Restoring the batteries' basket - part #5, reinforcement and protection
The restoration of the batteries' basket as been the major work in progress in the last weeks. All steps in part #1, #2, #3 and #4 resulted in a good looking part for less than CHF50 roughly 12 work hours!


Nevertheless, I did not solve the original design problem of the batteries' basket: dirt, water and worst of all *salty water* can get between the batteries base and the metal frame, which will anyways result in corroded metal sooner or later...
I was relatively lucky to have the bottom frame without corrosion holes (as many I saw online) and still quite stiff. However, I am not mentally ready to see all my work wasted in a couple of years!
After exchanging ideas with some friends, it was clear that the best thing to do was to seal the bottom. The only problems here are (1) I do not have a soldering machine, and (2) even if I bought/borrowed one the existing metal frame is already too fragile to solder something decently.
With these limitations in mind, a colleague of mine proposed me to use rivets instead of soldering (!) great idea! However it would not be 100% water tight... Then I though about combining the rivets with a surface bonder usually know as "glue and tight" (sort of plumber's silicon that glues as a rock!) to get a rigid and water tight assembly solution - perfect!
I was "just" missing the main thing: what kind of material to use :/
A steel metal sheet would be the first option, but it would be rust prone! In addition a bit too hard to cut without proper tools... also difficult to bend and make corner shapes... An aluminium plate would be better, but still difficult to cut and bend... A plastic material would be easier to work with, but it would ultimately brake while in use...
Well... I decided to go to an hardware store and see if I could get inspired! It didn't took too long to find the solution :] instead of thick aluminum plate I found a 0.8mm thickness aluminum sheet:
- easy to cut
- easy to bend
- cheap!
I grabbed three sheets and ran back home!
First I started some testing on cutting and found that using a pair of metal scissors results in a big mess as the sheet is to soft to stay flat when using the scissors... the funny thing is that being so soft as some advantages:
- you can use a (very) sharp cutter to make a deep trace in the sheet and then bend a couples until it breaks off, making a perfect cut!!
- if you make a less deep trace and bend only in one direction, you end with a perfect corner!!
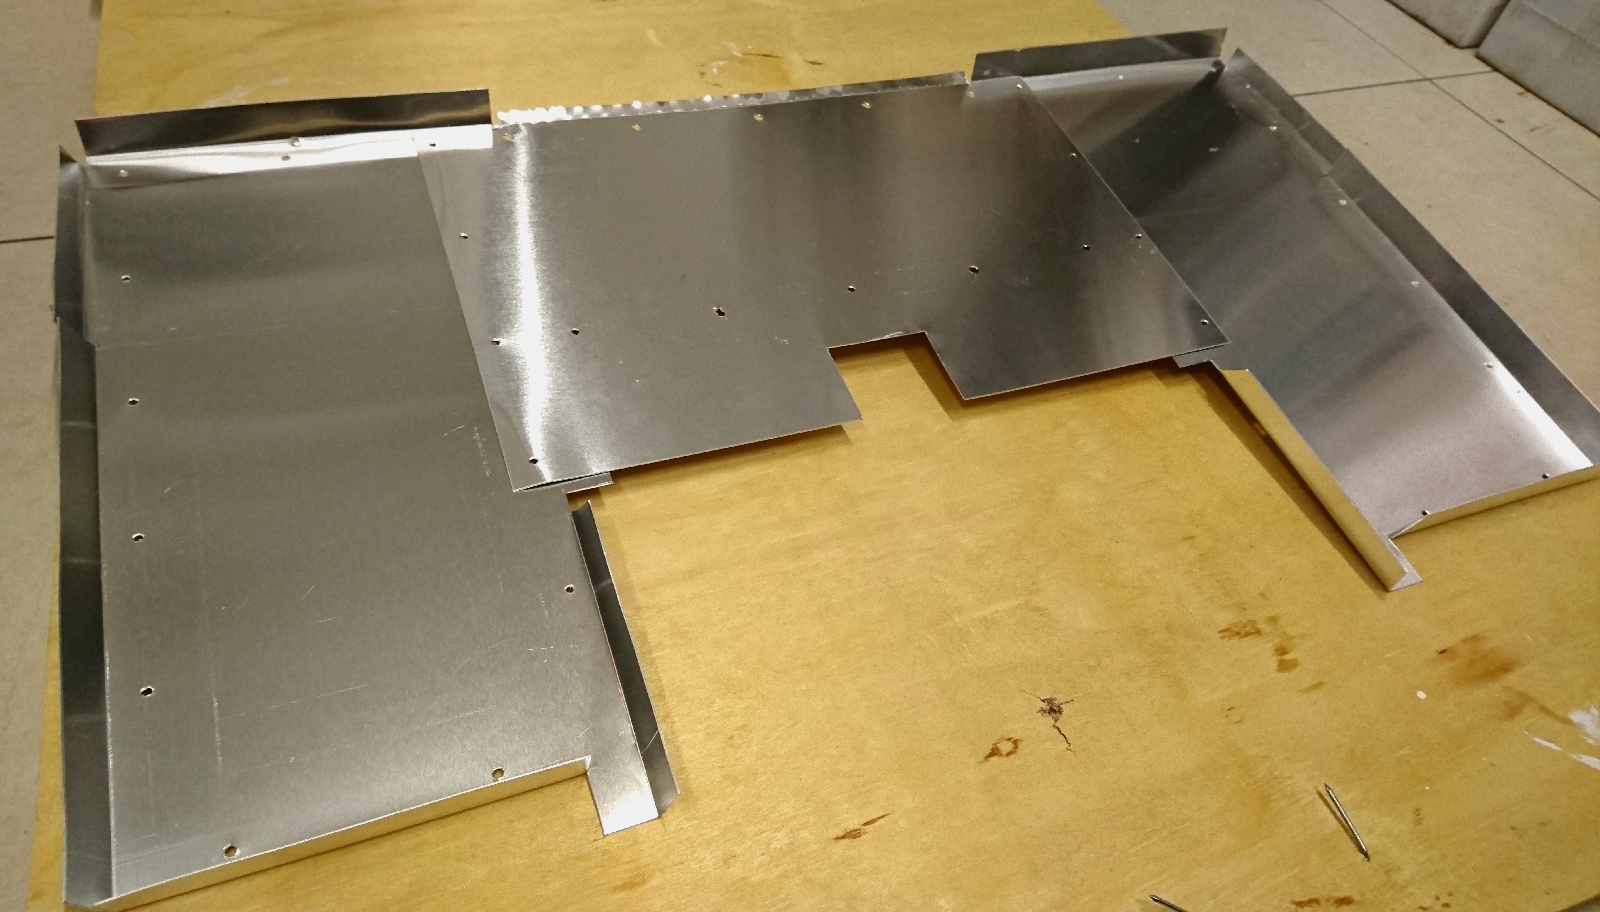
I just have to put the sheets in place, mark some cuts and bends, ... and done:
Honestly, using this aluminum sheets made it so easy that in roughly 3 hours I had it!
Moving on to the next step, now I need to mark and drill the holes in frame. At this point I realized that I needed to add about 1.5mm height in some parts of the frame, otherwises the protection sheets would not be installed correctly making it (at least) very ugly.
Back to the hardware store, grabbed some aluminum flat bars, and back to work again.
First I cutted the aluminium flat bar in several parts and then placed those in the parts of the frame missing the necessary height. With everything in place, I've marked the drillings from the protection sheets and then drilled the 3mm holes for the rivets.
At this stage it looked like this
The red tape was to hold in place while marking and drilling the holes.
I numbered and removed everything, put the referred surface bonder in the bars and set them in place again. Then a another layer of bonder on top of the flat bars
(Detail) I also added in the central part of the frame an additional support for the central protection sheet:
This will allow closing this hole in the frame, making the bottom completely flat :]
After this, I took 3mm wide by 6mm length rivets and fixed the protection sheets to the frame, ending up with this:
Notice there's a small opening so I can access the electric motor fixation bolt. Once the access is no longer needed, the hole can be covered with a small piece of duct tape.
Here's some photos with additional details on the assembly
It is finally finished and ready to leave to dry.
It definitely looks much better, and the more sensitive areas of the frame are now decently protected. Definitely worth the time (roughly 8 hours) and money (some CHF40 in the sheets, bonder and rivets) invested!
Regarding the bonder, I've used Coltogum All-in-one:
More info can be easily found at the manufacturer website.
I've chose white due to the color used in the batteries' basket, but there others available. You can find this in most hardware stores for about CHF10.


Comments
Post a Comment